
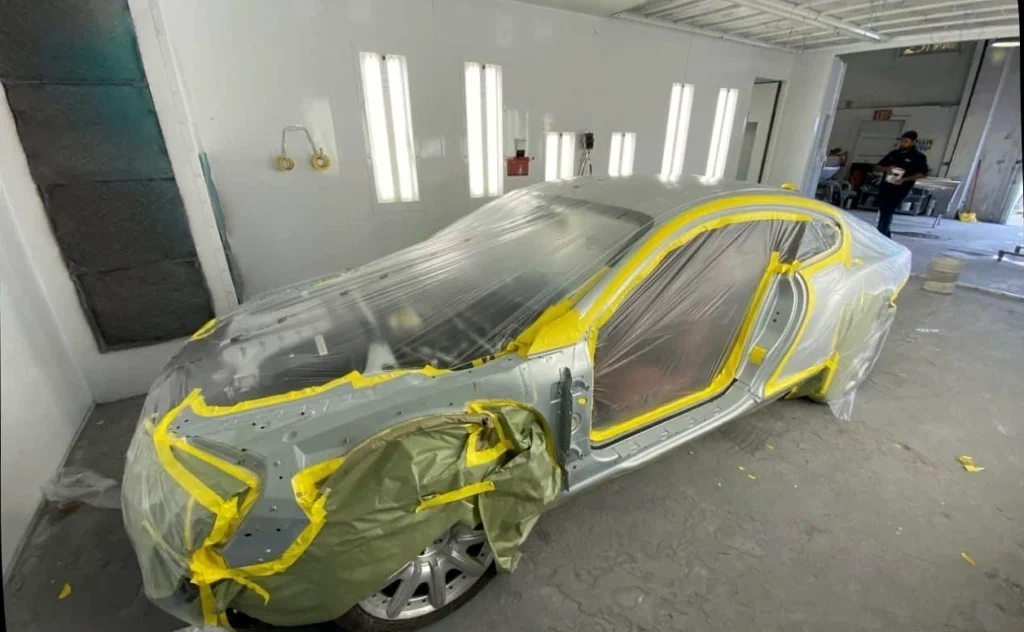
Your fender was damaged. Your door wasn’t. So when the door shows up on the paint estimate, it’s fair to ask why.
An undamaged panel may need paint blending so the new color transitions into the existing finish without an obvious change at the panel gap. That doesn’t mean the door needs dent repair or replacement. It means the paintwork can extend beyond the damaged part.
But “we need to blend it” shouldn’t be the end of the explanation. Before you approve the job, the shop should show you which panels are involved, what will happen to them and why that approach makes sense for your car.
Why can’t you just use the paint code?
The code is the starting point. It doesn’t tell the painter everything about the finish on the car in front of them.
There may be several color variants under that code. A nearby panel may have been repainted before. The color also needs to be checked in useful lighting, close to the area being repaired.
Paint manufacturers build those checks into their instructions. For example, PPG’s color-identification procedure calls for comparing variants against the vehicle and, where needed, making a spray-out card—a small painted sample used to check the match before painting the car.
That’s why looking up a formula and spraying one panel isn’t always enough. Two panels can carry the same color name and still look different when they’re right beside each other.
What blending actually does
With a typical basecoat-and-clearcoat finish, the basecoat supplies the color. Clear coat goes over it to protect the finish and provide its intended appearance.
Blending gradually transitions the new color into the surrounding finish. The painter still needs a suitable color match first; blending isn’t a way to hide the wrong color.
A simple example: imagine a replacement front fender beside an undamaged door. If the new color stops at the fender’s rear edge, any difference can stand out across that gap. The repair plan may include blending color into part of the door to make the transition less noticeable.
Sometimes there’s enough room to blend within the damaged panel itself. Other repairs need space on a neighboring panel. The location of the repair, available space, color and applicable paint instructions determine the approach. PPG’s basecoat blending guidance specifically accounts for the space needed to make that transition.
Being next to a damaged panel isn’t, by itself, a reason to paint it. Ask the estimator to point out where the color needs to go.
Does that mean the whole door gets repainted?
This is where estimates can get confusing. The area receiving color and the area receiving clear coat may be different.
The color might be blended through only part of a door, while clear coat extends across the panel to its edges. So you can see preparation and clear-coat work for the whole door even though it isn’t receiving full color coverage everywhere.
The stopping point has to follow the applicable refinishing instructions. PPG, for example, specifies extending clear to the nearest panel edge or break point for its stated warranty purposes in its clearcoat application procedure. That doesn’t establish one rule for every product or repair.
A useful question is: “Which area gets color, and where will the clear coat stop?” That gets you a much clearer answer than asking whether the shop is painting “the whole thing.”
Why are the handle, molding or mirror on the estimate?
An undamaged handle can still be in the way of the paintwork. Removing and reinstalling it may allow access to prepare and finish the area around its edges. The same can apply to moldings, weatherstrips and other trim.
On an estimate, R&I means remove and install. It doesn’t mean the part is being replaced. If replacement is listed, ask why and whether the original part can be reused.
Not every piece needs removal. Some suitable trim can be lifted and masked, as 3M’s collision-repair masking guidance explains. The part, access and repair instructions matter.
Those preparation and reassembly steps help explain why blending costs more than the paint itself. When comparing estimates, check what each one includes around the panel—not just the number of panels listed.
What changes with pearl, metallic and luxury-car finishes?
A pearl white, metallic silver or deep translucent red can need more planning than the color name suggests. The effect comes from how the finish’s layers work together, not just the pigment in a can.
With some translucent finishes, the undercoat contributes to the final color. Application also affects the appearance of metallic and pearl effects. PPG’s guidance on translucent factory finishes explains why colors that look similar can use different paint systems.
This matters on newer vehicles and luxury-car collision repairs, but it isn’t limited to expensive cars. A daily driver’s pearl finish can raise the same matching questions as a BMW, Mercedes-Benz or Tesla. The badge alone doesn’t tell us how many panels need paint.
Tell the shop about previous paintwork, a wrap or paint-protection film. If the finish is matte or satin, mention that when arranging the inspection so the team can confirm the appropriate repair approach.
A real example from Universal’s repair archive
Our published 2024 Tesla Model Y repair breakdown includes replacement and refinishing of the left rear door, with paint blending into the neighboring left front door.
Those were separate operations serving different purposes: replacing the damaged rear door and managing the color transition beside it. The breakdown also explains the color-matching and finishing work included in that particular repair.
It isn’t a template for every Model Y. It’s a concrete example of why the paint plan can reach beyond the panel being replaced.
“I’m paying myself. Can we keep the cost down?”
Absolutely ask. Tell us what you’re trying to achieve and what you can spend before approving the work.
If your priority is making a small mark less noticeable, ask whether a limited cosmetic option is suitable and what will still be visible afterward. If you expect the repair to blend into the surrounding finish, the estimate needs to account for the work that requires.
Keeping original paint where possible is a reasonable preference. So is wanting a finished repair without an obvious color change. Discuss both. Leaving a blend operation out of an estimate can lower the price, but you need to understand what that changes about the expected result.
Ask these four questions when comparing proposals:
- Which panel is damaged, and which panels are included only for blending?
- Where will the color and clear coat be applied?
- What trim removal, materials and finishing work are included?
- If we reduce the work, what difference should I expect to see?
A less expensive estimate may cover a different repair. Having that conversation now is easier than discovering the difference at pickup.
What if the insurance estimate doesn’t include blending?
Bring it with you. A missing paint operation is something to review, not proof that you owe the difference or that the insurer will automatically add it.
At Universal Motorcars, our repair-related insurance supplement process happens with the vehicle at the shop and appropriate work authorized. We document the additional work needed, explain the reasons and communicate directly with the adjuster.
The insurer reviews the request separately. If an item remains disputed or could become your responsibility, we discuss it before asking you to authorize that work. You don’t need to argue paint procedures with the insurance company on your own.
Will blending add time to the repair?
It adds work that needs to be included in the schedule: preparation, color checks, paint application, drying or curing, reassembly and finishing.
And sometimes there are hiccups. The first color sample may need adjustment. Previous paintwork can need attention before new material goes over it. A required trim piece may not be available when expected. Insurance review can hold up a decision, too.
That doesn’t give anyone a free pass to leave you guessing. Ask what stage the vehicle is at and what’s still needed before pickup. Our collision repair timeline guide explains the other things that can change the schedule.
When you collect the car, look over the repaired area and neighboring panels with the team. If something doesn’t look right, point it out. Ask about the written paint warranty and aftercare instructions before washing, waxing or arranging paint-protection film.
Bring the estimate. We’ll walk through it with you.
Universal Motorcars handles accident-related paint and refinishing at both Las Vegas locations, for insurance repairs and self-pay customers.
Call Spring Mountain, 5585 Spring Mountain Rd, at 702-754-6774, or Post Road, 3570 W Post Rd, at 702-430-1000, to arrange a preliminary visual estimate. Bring the vehicle and any estimate you already have. We’ll explain which panels need attention, why blending is being recommended and what you’re agreeing to before work begins.